These are two designs I was absolutely dying to try out. Please excuse the messiness and the dry hands. Time wasn't on my side!
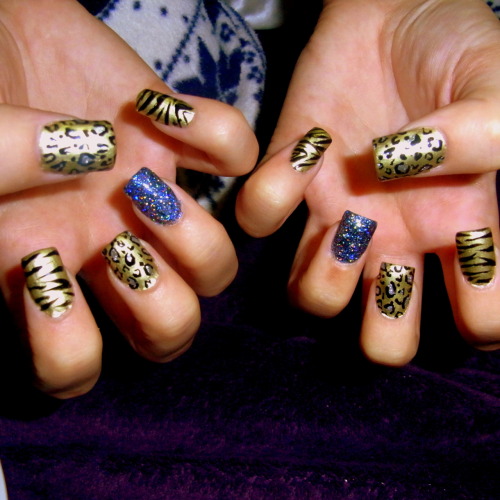
 The first is zebra print, and I think I need some extra practise! It's pretty difficult doing it on your own nails as opposed to fake ones, so they're a bit rough and ready. To get this effect, I applied two coats of white for the base colour. I think the polish was from an old manicure set that I don't use any more, nothing spectacular but it does the job! Then I used a black nail art pen by Giles (from New Look) to paint on the stripes. I think this would have worked better if I had a picture of a zebra in front of me to work from. This could have made the manicure look a lot more realistic. As it was though, everyone loved them, ad I look forward to doing more animal print soon.
 The next manicure is a little bit art-inspired. Monet-style impressionist roses and sparkly gold to go with a very pretty dress in a similar style. I love this manicure, but it took ages to do, and only on two nails! First, I applied a coat of Front Cover gold sparkle polish on each nail. Then I focused on the ring fingers. With a paint brush, I dabbed red polish on the nail to make a circle.. ish. It doesn't need to be exact, thank God. Then I highlighted using a white polish and that same brush when the first colour was dry. With the previous red paint still on it, it creates a little bit of pink that looks quite nice. Then, after cleaning the brush, I painted some light green on for the leaves, in a 'V' shape if I could. To finish off the manicure, I put some more of the sparkly gold coat on the tips of my other nails and used Gold by Giles nail art pen in gold to create a half moon.
What do you think?
Kyra